 New
New 
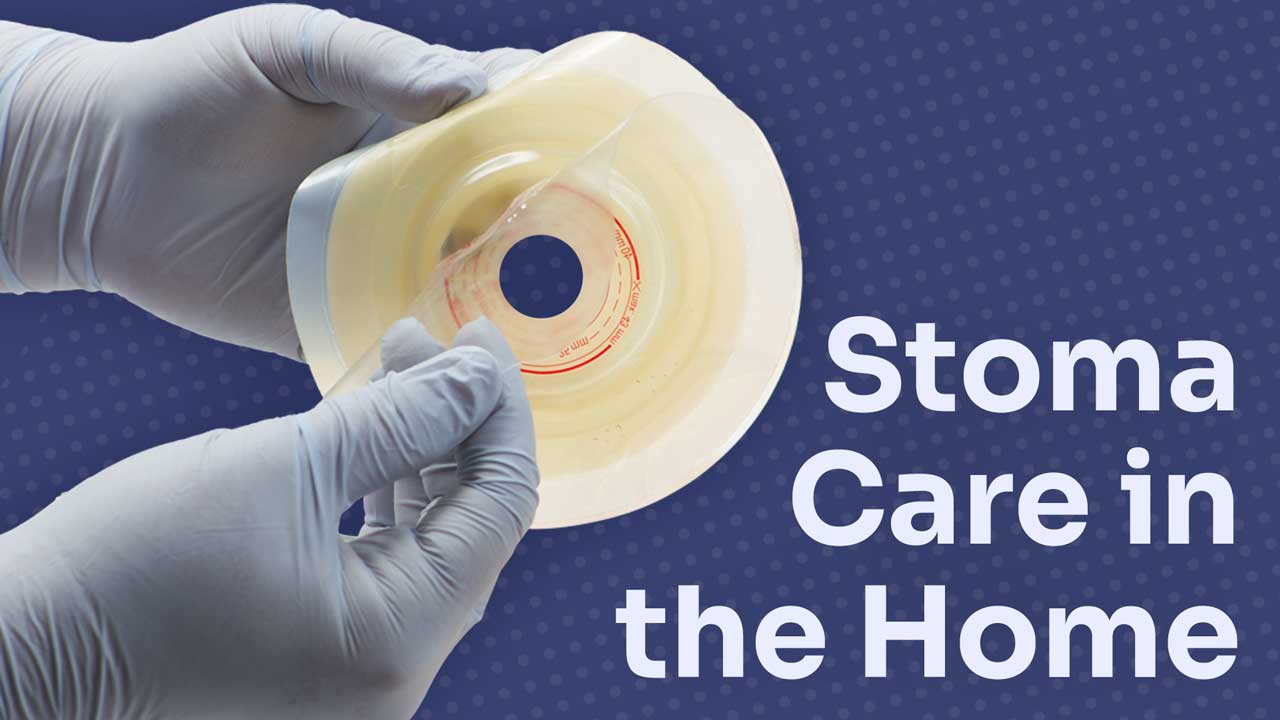
A stoma is a surgically made hole in the abdomen that allows body waste to be removed from the body directly through the end of the bowel into a collection bag (Healthdirect 2023; Cancer Council Victoria 2025).
When caring for someone who is living with a stoma, you may need to help them empty and change the stoma appliance. It is also crucial to be able to identify any red flags that require escalation of care.
Monitoring the Stoma
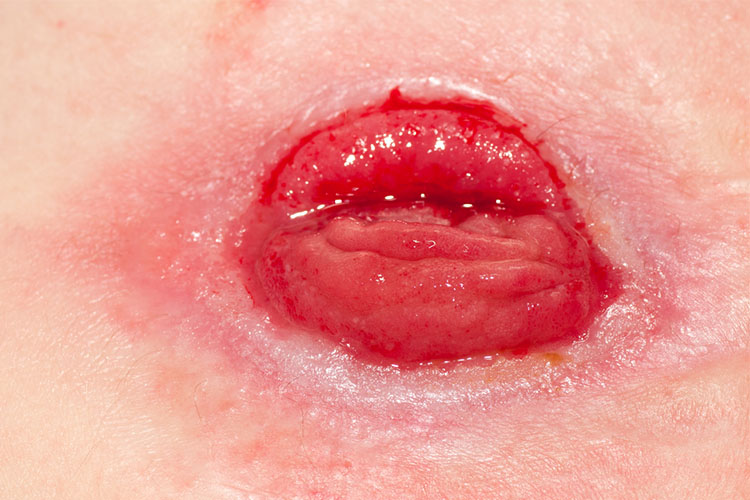
Upon examination, take note of the following:
- The stoma should be pink or red, moist and shiny
- Swelling may be present during the postoperative period, but should decrease in size within six to eight weeks
- Minor bleeding may occur, but it should stop when you apply light pressure to the area
- The mucocutaneous junction (the border between the stoma and the abdominal skin) should be intact, with even, intermittent sutures in situ
- The skin surrounding the stoma (peristomal skin) should be intact, healthy and look similar to the skin on the other side of the abdomen
- Transient erythema (reddening of the skin) may occur after removing the appliance, but should not remain red or painful
- The stoma should be protruding between 2 and 3 cm from the skin
- The volume, colour and consistency of output should be monitored and documented.
(WACHS 2025)
How to Empty the Stoma Appliance
The stoma appliance should be emptied when it is between one-third and half full (WACHS 2025).
- Explain the procedure and obtain consent from the client
- Ensure the client’s privacy and comfort
- Perform hand hygiene
- Gather all equipment required for the procedure
- Don non-sterile gloves and PPE according to standard precautions
- Place a waterproof protective sheet between the client and the stoma appliance
- Locate an appropriate receptacle
- Place a layer of toilet paper in the receptacle to prevent splashing
- Pull the client’s clothes away from the stoma appliance
- Hold the stoma appliance over the receptacle in a position that is comfortable for the client
- Hold the stoma appliance facing upwards
- Open the appliance
- Unclamp or unroll the drainage outlet
- Slowly lower the opening of the drainage bag into the receptacle and slide your hands down the appliance to push out the contents
- Once all the contents have been emptied into the receptacle, wipe the inside and outside of the spout with toilet paper
- Check the appliance for tears or holes and replace if necessary (see below)
- Rinse the clamp if there is faeces on it
- Apply pouch deodorant on the outside of the bag if required
- Close the appliance
- Dispose of equipment and PPE according to local policies and procedures
- Perform hand hygiene
- Ensure the client’s comfort.
(WACHS 2025; ACS 2025; UOAA 2024)
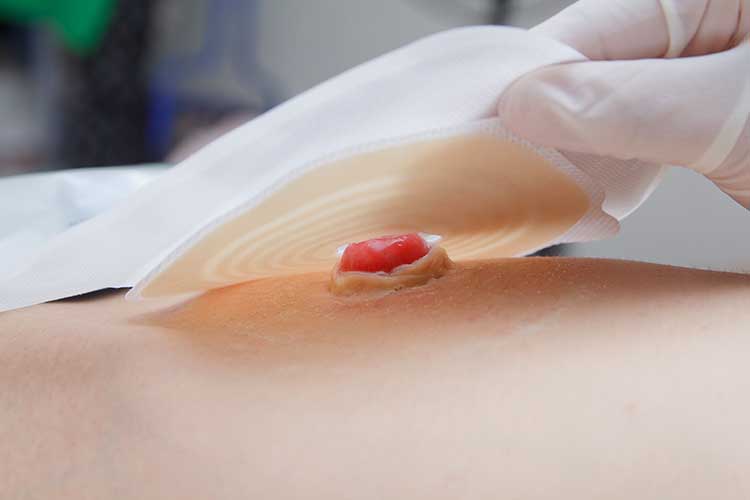
How to Change the Stoma Appliance
The required frequency for changing a stoma appliance will depend on the client, but as a general guide:
| Type of appliance | How often to change |
|---|---|
| One-piece drainable | Every 1-2 days |
| Two-piece drainable | Base: Every 2-3 days |
| Pouch: Daily | |
| One-piece closed | 1-3 times per day |
| Two-piece closed | Base: Every 2-3 days |
| Pouch: 1-3 times per day |
(Canberra Health Services 2023)
Note: Never attempt to repair a leaking stoma appliance. Always replace it with a new one.
- Explain the procedure and obtain consent from the client
- Ensure the client’s privacy and comfort
- Perform hand hygiene
- Gather all equipment required for the procedure
- Don non-sterile gloves and PPE according to standard precautions
- Place a waterproof protective sheet between the client and the stoma appliance
- Empty the stoma pouch if required (see above)
- If you are using a two-piece appliance, remove the old stoma pouch by pressing down on the base and removing the pouch. To remove the base, gently press the peristomal skin using an adhesive remover wipe and peel from the top right corner.
- Dispose of the old stoma appliance into an appropriate clinical waste bin
- Remove gloves if soiled, perform hand hygiene and apply new gloves
- Use warm tap water and a soft, disposable cloth or tissue to clean the stoma and peristomal skin (avoid soap as this can impair adhesion). Pat the area dry
- Remove gloves
- Perform hand hygiene
- Apply clean gloves
- Measure and trace the shape of the stoma onto the plastic backing of the new appliance base. Ensure you cut the base to the correct size (no more than 5 mm of peristomal skin left exposed)
- Cut out the base with scissors
- Remove the plastic backing from the base. This can be used as a template for the next appliance change.
- Run your finger around the inside of the cut edge to smooth any sharp edges
- Close and secure the outlet of the new pouch (if it is drainable)
- Place the adhesive base of the new appliance at the base of the client’s stoma and then fit over the stoma
- Gently run your fingers around the adhesive to create a firm seal
- Attach the new stoma bag to the base plate (if using a two-piece appliance)
- Secure the closure on the stoma bag (if using a drainable appliance)
- Place a warm towel over the appliance and discourage the client from bending for 10 minutes
- Dispose of equipment and PPE according to local policies and procedures
- Perform hand hygiene
- Ensure the client’s comfort
- Document stoma observations and the appliance change.
(WACHS 2025; Canberra Health Services 2023)
When to Escalate Care
The following signs and symptoms require escalation of care to an appropriately qualified medical practitioner:
- Pale, dark, dusky or black stoma
- Excessive swelling
- Bleeding
- Disruption to the mucocutaneous junction
- Dehiscence of the mucocutaneous junction
- Extruding serosal tissue
- Skin redness, erythema, rashes or irritation
- Impaired skin integrity
- Skin pain or tenderness
- Retracted stoma (where the stoma slides back into the abdomen below skin level)
- Prolapsed stoma (where the stoma slides out of the abdomen and protrudes more than 5 cm from skin level)
- Infection
- Parastomal hernia (wherein part of the bowel protrudes through the stoma)
- Diarrhoea
- Dehydration
- Narrowing of the stoma
- Difficulty passing stools through the stoma
- Obstruction of the stoma due to scar tissue
- Impacted faeces
- Kidney stones
- Gallstones
- Necrosis
- Stomal dehiscence
- Decreased output
- Excessive output
- Incorrectly fitted stoma appliance
- Appliance leakage.
(WACHS 2025; Canberra Health Services 2023; Finlay et al. 2018; Better Health Channel 2011)
Note: This article is intended as a guide only for non-clinical staff who are required to provide stoma care for home care clients and should not replace best-practice care. Always refer first to your organisation's policies and procedures on stoma care.
Test Your Knowledge
Question 1 of 3
How far from the skin should a stoma protrude?
Topics
Further your knowledge

References
- American College of Surgeons 2025, Empty the Pouch (Ostomy Skills), ACS, viewed 8 August 2025, https://cssnova.com/wp-content/uploads/2025/01/Empty-the-Pouch-Ostomy-Skills.pdf
- Better Health Channel 2011, Stoma After Ileostomy or Colostomy, Victoria State Government, viewed 8 August 2025, https://www.betterhealth.vic.gov.au/health/conditionsandtreatments/stoma-after-ileostomy-or-colostomy
- Canberra Health Services 2023, Procedure: Stoma Management – Adults, Adolescents, Children, Infants and Neonates, ACT Government, viewed 8 August 2025, https://www.canberrahealthservices.act.gov.au/about-us/policies-and-guidelines
- Cancer Council Victoria 2025, Having a Stoma, Cancer Council Victoria, viewed 8 August 2025, https://www.cancervic.org.au/cancer-information/types-of-cancer/bowel_cancer/having-a-stoma.html
- Finlay, B Sexton, H & McDonald, C 2018, ‘Care of Patients With Stomas in General Practice’, Australian Journal of General Practice, vol. 47, no. 6, viewed 8 August 2025, https://www1.racgp.org.au/ajgp/2018/june/stomas-in-gp
- Healthdirect 2023, Living With a Stoma, Australian Government, viewed 8 August 2025, https://www.healthdirect.gov.au/living-with-a-stoma
- United Ostomy Associations of America 2024, Step by Step Guide to Emptying and Changing the Ostomy Pouch, UOAA, viewed 8 August 2025, https://www.ostomy.org/wp-content/uploads/2025/03/2024-086-UOAA-Step-by-Step-Pouching-Guide-FINALV2.pdf
- Western Australia Country Health Service 2025, Stoma Management Guideline, Government of Western Australia, viewed 8 August 2025, https://www.wacountry.health.wa.gov.au/~/media/WACHS/Documents/About-us/Policies/Stoma-Management-Guideline.pdf?thn=0