Blood cultures are considered the gold standard method of detecting pathogens related to bacteraemia and sepsis, which may be life-threatening and require immediate treatment (CEC 2021; Pathology Tests Explained 2023).
However, despite the importance of these tests, there are several disadvantages when they are used improperly or unnecessarily, including increased costs and false positives (Choosing Wisely Australia 2015).
Therefore, it’s essential that blood cultures are taken only when needed and are performed correctly.
Note: This article is intended as a refresher and should not replace best-practice care. Always refer to your organisation's policy on blood culture collection.
What is a Blood Culture?
A blood culture is a type of phlebotomy in which samples of blood are collected via venepuncture in order to determine whether a systemic bloodstream infection (bacteraemia, fungaemia or viraemia) is present (Pathology Tests Explained 2023).
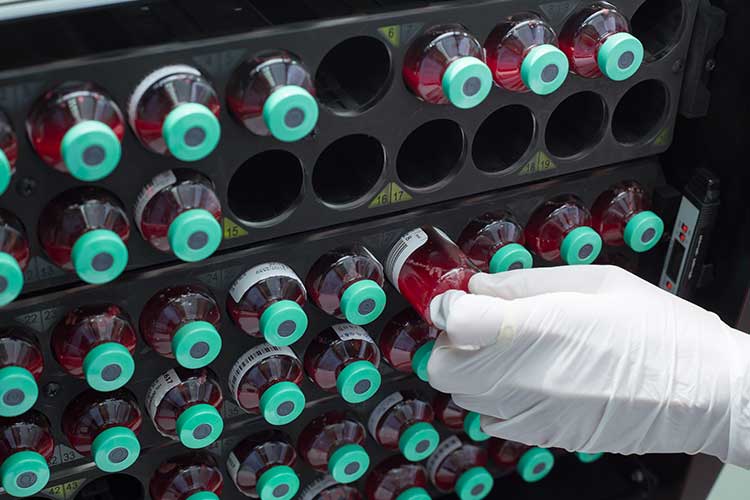
Once blood samples have been taken, they are added to cultures - substances that encourage the growth of pathogens. Any pathogens that appear in the blood sample are then detected and identified (Testing.com 2022).
If the patient’s blood culture is positive, i.e. pathogens have been found, appropriate treatments will then be prescribed (Pathology Tests Explained 2023).
If required, gram stain testing and/or susceptibility testing to identify an appropriate antimicrobial to treat the infection may also be performed (Pathology Tests Explained 2023).
Most bloodstream infections are caused by bacteria - either aerobes (bacteria that prefer oxygen) or anaerobes (bacteria that prefer reduced-oxygen environments). Fungi and viruses may also cause bloodstream infections, but this is less common (Pathology Tests Explained 2023).
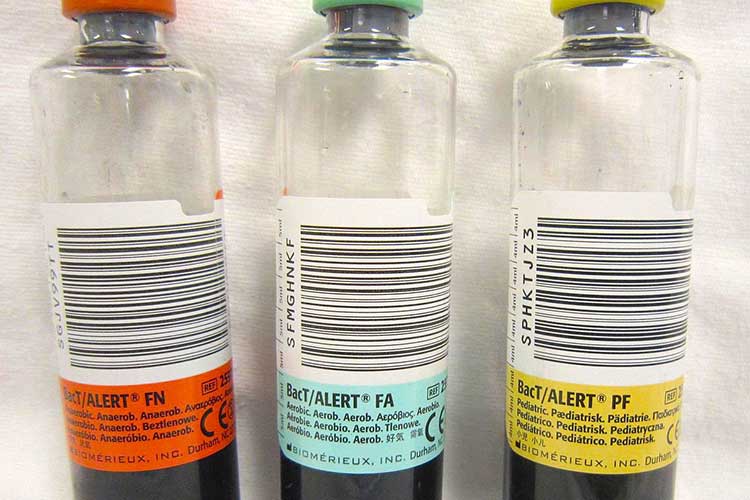
Best practice is to take a minimum of two sets of blood samples from two different sites on the body. One set includes two blood culture bottles - one containing nutrients that support the growth of aerobes and the other containing nutrients that support the growth of anaerobes. Therefore, four bottles should be collected in total (CEC 2021; Pathology Tests Explained 2023).

One set alone is an inadequate sample volume and reduces the sensitivity of the test. Collecting two sets of samples helps to rule out skin contaminants that may otherwise cause false positives and detect any pathogens that are present in small numbers or are being released intermittently into the bloodstream (CEC 2021; Pathology Tests Explained 2023).
If two different culture sets return positive results for the same pathogen, it’s likely the patient’s symptoms are being caused by this pathogen (Pathology Tests Explained 2023).
When is a Blood Culture Indicated?
A blood culture may be recommended for adult patients who have:
- Suspected sepsis
- Severe pneumonia
- New confusion, a new change in behaviour or delirium
- Fever or history of fever (in immunocompromised patients)
- Fever or evidence of infection after recent surgery or with a vascular access device in situ
- Fever after recent travel overseas
- Fever of unknown origin (in patients who appear unwell or are at risk of deteriorating suddenly, e.g. older adults, those with chronic illness)
(CEC 2021)
On one hand, blood cultures are helpful in determining specific pathogens that are present in the patient's bloodstream in order to assist in the selection of appropriate antimicrobial therapies. Furthermore, those who display a positive blood culture result are often experiencing severe and potentially life-threatening illnesses, so being able to make an accurate diagnosis and prescribe the correct treatment as soon as possible is crucial (Choosing Wisely Australia 2021).
On the other hand, however, blood cultures are prone to false positives - in fact, 50% of positives are potentially false (Choosing Wisely Australia 2015) - meaning that patients may be exposed to antibiotics when they aren’t actually required. This may contribute to antibiotic resistance. Repeated blood draws may also cause pain and blood loss for the patient (Choosing Wisely Australia 2021).
Blood Culture Collection Sites
Remember that two sets of samples need to be taken from two different sites on the body. The preferred sites are the antecubital fossa or dorsum of the hand. Where possible, other sites should be avoided (especially femoral stabs), as they are associated with a higher risk of contamination (TeachMeSurgery 2021).
If the patient has a central venous access device in situ, one set of samples should be taken from a venepuncture site, and the other should be taken from a line site (Morgan 2024).
Samples should not be taken via an intravenous cannula (CEC 2021).
How to Take a Blood Culture
Remember:
- Always use aseptic technique to reduce the risk of cross-contamination and false positives
- Take two sets of blood cultures (four bottles in total)
- Collect 10 mL of blood per bottle
- Always collect blood cultures first before collecting other blood pathology tubes.
(CEC 2021; Choosing Wisely Australia 2021)
- Explain the procedure to the patient and gain their informed consent.
- Perform hand hygiene.
- Check the patient’s pathology request form and their identification.
- Ask the patient about relevant medical history, including:
- Allergies, including whether they have a history of chlorhexidine allergy
- Needle phobia
- History of fainting from injections
- Blood clotting disorders or taking medicines that impair blood clotting (e.g. warfarin)
- Arteriovenous fistula
- Breast surgery or lymph node removal
- Make any appropriate arrangements (e.g. ensuring the patient is seated in case they faint). Reassure the patient if they are anxious and ask what would make them more comfortable.
- Perform hand hygiene and gather equipment on a procedure trolley. There should be two blood culture sets, each containing one aerobic bottle and one anaerobic bottle (check the expiry date prior to use).
- Don protective eyewear and perform hand hygiene.
- Remove the cap of each blood culture bottle. Using an alcohol swab, scrub the vial stoppers and ensure they dry completely.
- Choose the most appropriate arm for insertion and apply a tourniquet to palpate and determine the most appropriate vein. The chosen vein should be large, visible, straight and clear. The tourniquet should be left on for no longer than two minutes.
- Disinfect the chosen insertion site using alcohol or alcohol with chlorhexidine. Use a circular scrubbing motion, spiralling out from the chosen site. Use a fresh swab for each scrub, performing two to three scrubs for one to two minutes in total. Allow the site to dry.
- If you expect to re-palpate the site after cleaning, don sterile gloves and follow sterile procedure.
- Perform hand hygiene.
- If you don’t expect to re-palpate, don sterile gloves and follow aseptic non-touch technique. However, if you do need to re-palpate, you will need to clean the site again as per step 8.
- Take the collection set and remove the safety sheath from the needle.
- Hold the patient's arm and place your thumb below the chosen puncture site to stabilise the vein.
- Ask the patient to form a fist to make the vein more visible.
- Inform the patient that you are intending to puncture the chosen site.
- Enter the vein from above or the side of the site. You should puncture the vein at a 15 to 30-degree angle with the bevel facing up. Slightly decrease the angle of the needle once you have entered the vein and insert a fraction further. Do not thread the needle up the vein.
- Immobilise the needle with one hand and attach the aerobic blood culture bottle to the adapter. (The aerobic blood culture bottle must be filled first, as there will be air inside the collection set).
- Fill the aerobic blood culture bottle to the 10 mL line. Keep the bottle upright and under the collection site.
- The tourniquet can be loosened slightly during blood collection.
- Once filled to the 10 mL line, remove the aerobic blood culture bottle and attach the anaerobic blood culture bottle to the adapter. Repeat the collection procedure.
- Gently turn the bottles over to prevent clotting.
- Once the blood collection has been completed, release the pressure of the tourniquet and then completely remove the needle (safety sheath should be applied).
- Apply pressure to the collection site until the bleeding stops. Keep the patient’s arm straight.
- Dress the collection site. The patient should take over applying pressure to the collection site if possible.
- Repeat steps 9 to 26 for the second set of samples. Ensure you choose a different collection site.
- Discard needles into a sharps container and dispose of other equipment as required.
- Label the samples appropriately.
- Clean any body fluid spills.
- Remove gloves and perform hand hygiene.
- Remove protective eyewear and perform hand hygiene.
- Monitor the patient for a few minutes after the procedure and inspect the collection site for bleeding. Provide aftercare advice. Tell the patient to alert a staff member if the collection site becomes painful, red, hot, or swollen.
- Dispose of waste and clean equipment as required.
- Place the bottles into a biohazard bag. Arrange for transportation to the laboratory, along with the patient’s request form. Ensure the bottles are transported at room temperature.
- Document the procedure appropriately.
- Perform hand hygiene.
- Inform the patient that it may take up to 48 hours for the results to be available.
(CEC 2021; Ausmed 2023; TeachMeSurgery 2015, 2021; Geeky Medics 2020)
If less than 10 mL of blood is collected, the entire sample should be placed into the aerobic bottle only. The aerobic bottle is the preferred choice, as pathogens that cause bloodstream infections are more likely to be aerobic than anaerobic (CEC 2021).
Only take another set of blood cultures if there is patient deterioration that suggests a new infection or non-response to antimicrobial therapy. The second set of blood cultures must be taken at least 72 hours after the previous set (Choosing Wisely Australia 2021).
Further Information
For more information about venepuncture in general, including potential complications, see the Ausmed Article Venepuncture: Phlebotomy and IV Cannula Insertion.

Test Your Knowledge
Question 1 of 3
What should you do in the event you collect less than 10 mL of blood from one site?
Topics
References
- Ausmed Editorial Team 2023, ‘Venepuncture: Phlebotomy and IV Cannula Insertion’, Ausmed, 24 August, viewed 14 February 2024, https://www.ausmed.com.au/cpd/articles/venepuncture
- Choosing Wisely Australia 2021, Choosing Wisely Champion Health Services Meeting- August 2021, online video, 27 August, viewed 14 February 2024, https://www.youtube.com/watch?v=vXnylRVF6wE
- Choosing Wisely Australia 2015, Recommendations: Australasian College for Emergency Medicine, Australian Commission on Safety and Quality in Health Care, viewed 13 February 2024, https://www.choosingwisely.org.au/recommendations/acem3
- Clinical Excellence Commission 2021, SEPSIS KILLS Program: Adult Blood Culture Guidance, New South Wales Government, viewed 13 February 2024, https://www.cec.health.nsw.gov.au/__data/assets/pdf_file/0005/259412/Adult-Blood-Culture-Guidance.PDF
- Geeky Medics 2020, Blood Culture Collection - OSCE Guide, online video, 14 February, viewed 14 February 2022, https://www.youtube.com/watch?v=SHx_P08m3_Y
- Morgan, B 2024, Procedure: Drawing Blood Cultures, London Health Sciences Centre, viewed 14 February 2024, https://www.lhsc.on.ca/critical-care-trauma-centre/procedure-drawing-blood-cultures
- Pathology Tests Explained 2023, Blood Culture, Pathology Tests Explained, viewed 13 February 2024, https://pathologytestsexplained.org.au/learning/test-index/blood-culture
- TeachMeSurgery 2021, Blood Cultures, TeachMeSurgery, viewed 14 February 2024, https://teachmesurgery.com/skills/clinical/blood-cultures/
- TeachMeSurgery 2015, Clinical Skills - Blood Cultures, online video, 1 September, viewed 14 February 2024, https://www.youtube.com/watch?v=ks7Pnzq75Kk
- Testing.com 2022, Blood Culture, Testing.com, viewed 14 February 2024, https://www.testing.com/tests/blood-culture/
 New
New 
